Fuel Tank & Enclosure Refurbishment
By Merak Group
Fuel Tanks
Merak fuel tanks are very vulnerable to water, especially on the left side. Here is a step-by-step approach to properly prepare your fuel tanks and fuel tank enclosures against rust and heat.
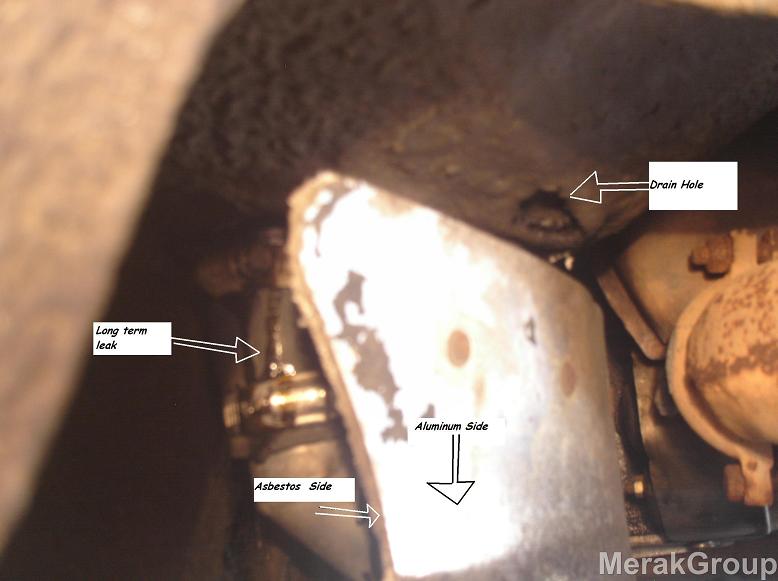
The first sign of trouble is leaking fuel mixed with the undercoating, who knew?

Underneath the car it is clear where the leak originated.
It is time to start the repairs.
Drain all the fuel from the tanks. There is a hex drain plug fitted to the intermediate fuel pipe found underneath the car fitted to the right side tank.

A second and easier method is only available for Meraks with an electric fuel pump. Clamp the feed fuel line from the Malpasi pressure regulator/filter (located by the A/C compressor) to the carburetors and disconnect. Turn the ignition key so as to only actuate the fuel pump. Fit the feed fuel line to an appropriately designated fuel container and undo the clamp, vice grips work well for this task. The fuel will then easily drain all the remaining gasoline into the container. To make things easy, empty the tanks when they are as close to empty as possible. A five gallon or five liter container should be more than adequate.
Remove the gas fill-up housing. Undo the all the fasteners/screws, and then gently lever the housing loose so as to avoid chipping any paint. Water seeps past the rubber seal and in between the housing/body panel perimeter causing much of the rust damage so many Meraks suffer. When reassembling, the rubber seal should receive an adhesive on all contact surfaces. The outer perimeter of the metal housing should also be sealed from the underside once the tank is reinstalled (for cosmetic reasons).

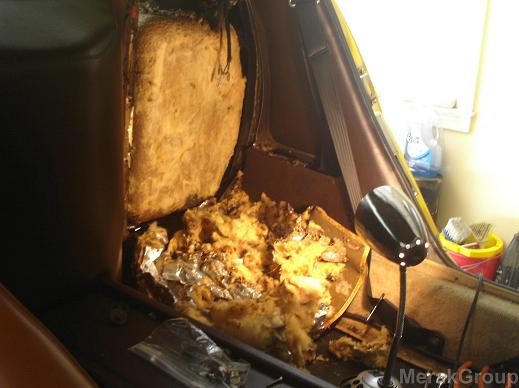
The rear seat and back panel are easily removed to give full access to the fuel tanks. Use all safety precautions when removing the fiberglass insulation. A respirator and a disposable HazMat (Hazardous Materials) suit would be most advisable to use. Also spraying the insulation with a water mist to keep the fiberglass dust particles down to a minimum would also be an advisable option.
From the engine bay side the insulation can be pushed into the cabin area as you see below by using a long sturdy pole. The insulation is very tightly packed.
Make sure to notate the order and color-coding of the 3 wires attached to the sending unit found at the top of the left tank. Take pictures and notes about how the all fuel lines are connected, as there is an equalizing vacuum hose that connects the two tanks and runs along the bottom side of the rear glass underneath the surrounding trim.
On the underside of the car, undo the top clap that connects the left tank intermediate fuel pipe hose to the bottom of the tank as seen in picture #2. Do not discard these clamps because they are very costly and rare. They can be refurbished to almost like new and reused in more visible areas later on, or just replace as per original. [There will be more on that in a forthcoming post.]
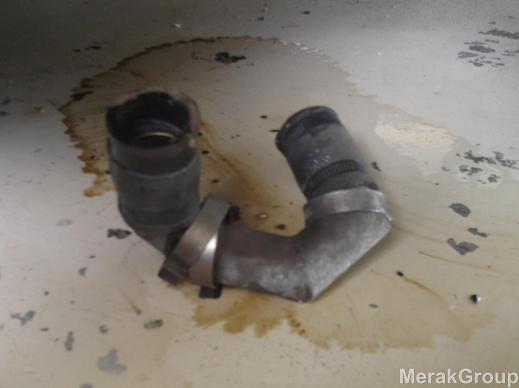
Removed Left Side Intermediate Fuel Pipe
The bonnet must be in the most upright position possible, in that way the bonnet hinge will allow for clearance once the tank is removed.

Now, it’s time to remove the fuel tank. A pry bar will make things easier along with a solid thick wooden dowel to maneuver the tank out of the enclosure.

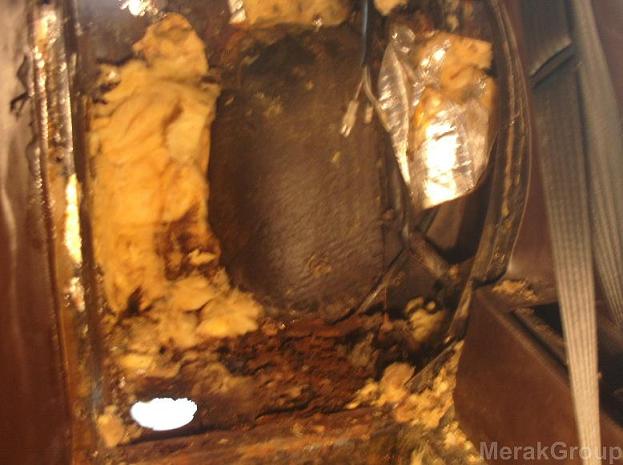
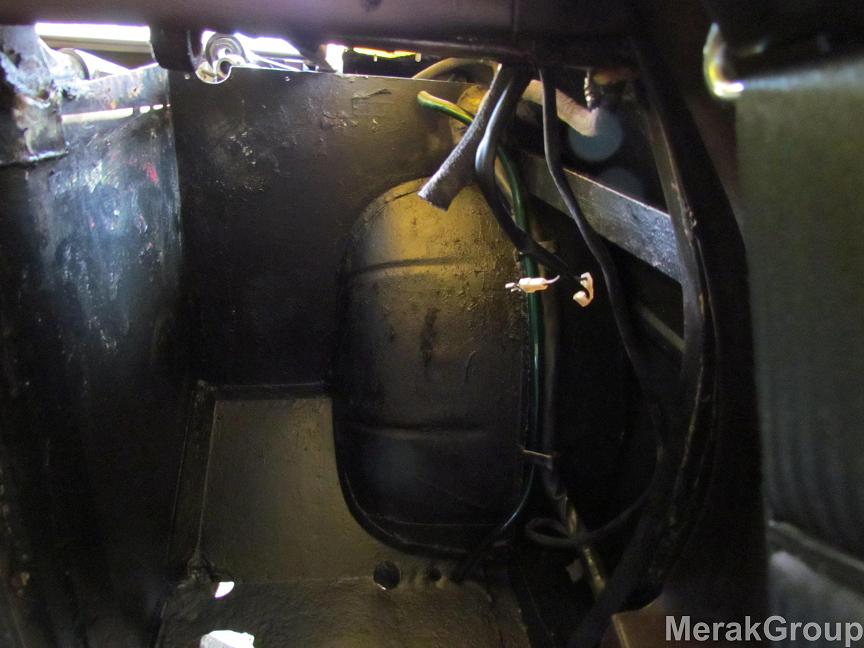
Once the tank is out, the enclosure will most likely be an ugly sight. Nevertheless, this area can easily be reworked so that rust, moisture, heat, and sound intrusion will never be a problem. Well, at least for the next hundred years or so.
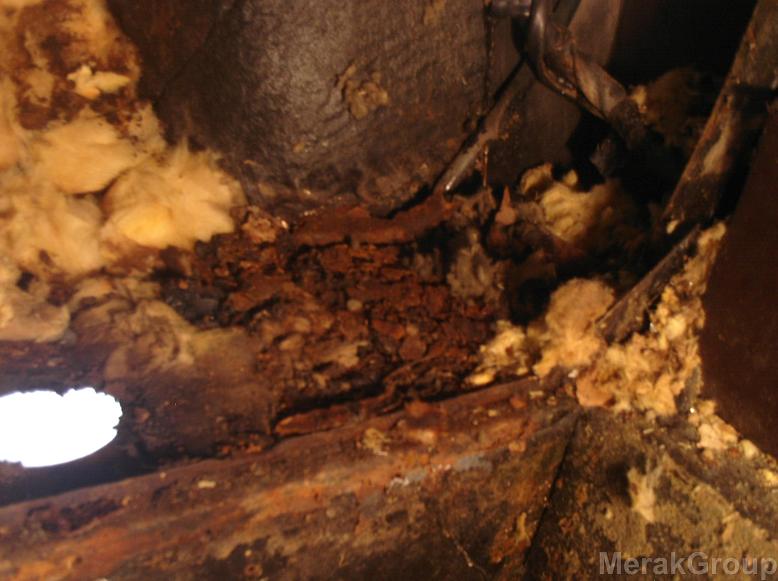
Save the rubber mat located at the bottom exit tube of the tank, or have a new one made. This mat helps keep unwanted debris out of the enclosure once reinstalled. Clean off the insulation and reseal the inside of the tank.
This particular tank had multiple pinholes throughout and had to be professionally repaired.
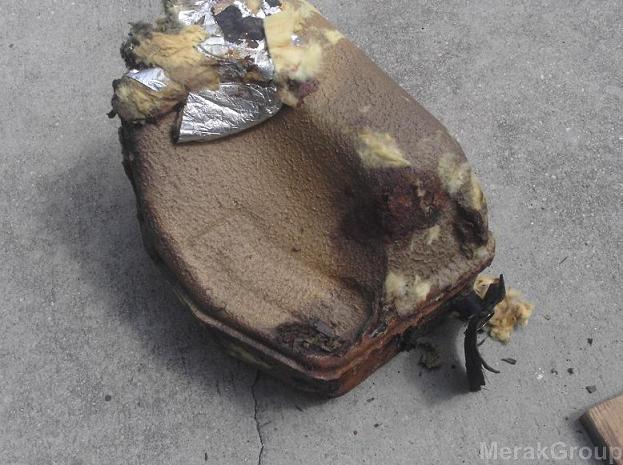
A rubber mallet and chisel are used to peel away the coating till clean metal is seen, then stop. This particular tank received two full separate acids baths prior to removing the coating off the rusted surface areas. The original factory coating was still tough as ever with a tenacious grip once clean metal was reached.

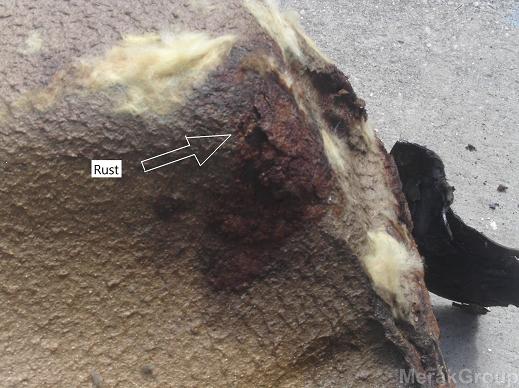
Now that the tank has been stripped of the coating, it is time to prep it against rust. The front part of the tank was for the most part left intact, as it had not been compromised by rust.

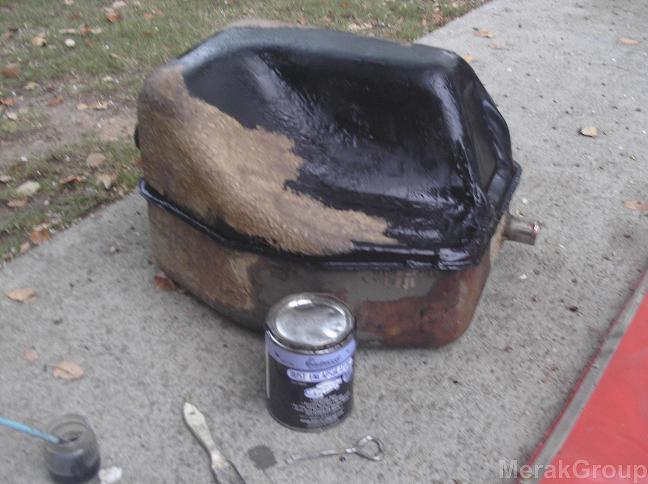
In this case, a rust converting paint was applied. A rust-dissolving agent could also be applied as an alternative option followed by some sort of sealing compound. Three separate coats were applied, each one a day apart to allow for proper curing. Once all the surfaces were properly covered, the thermal insulation begins.
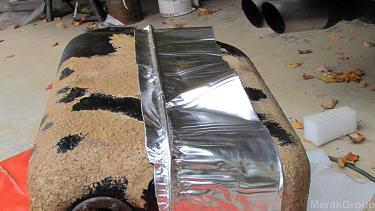
The material seen here is roofing patch sold at home improvement/hardware stores. For all intents and purposes it is the same as the commercially sold automotive heat and sound insulation material at a fifth of the cost. Once fully applied, a heat gun is used to literally melt the butyl rubber base onto the surface of the tank.
First the seam of the tank is covered with one length of thermal insulation with the ends meeting at the bottom of the tank in one neat seam. The rest of the tank starts to be layered from the bottom up with each new layer overlapping the last in a fish scale pattern to promote efficient water run off in case water was ever to enter the enclosure, as unlikely as that may be.

Gas Tank Enclosure
While the tanks are well insulated, the next phase is to address the enclosure.
Clean thoroughly and rustproof with three separate applications allowing for ample curing time for each application.
Start applying layers of the thermal barrier from the bottom up, followed by the use of a heat gun to ensure maximum adhesion. Slowly work in an upward direction overlapping each prior layer at the edge.


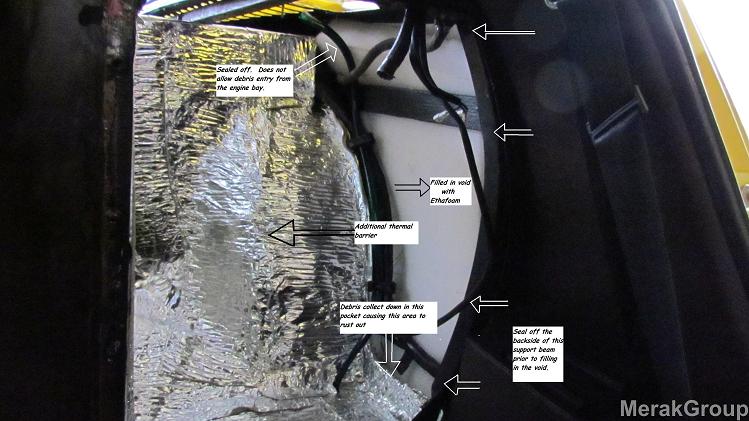
The gas tank enclosure now has thermal integrity. More is needed. Additional low weight duct thermal insulation is added. 2.5 inch thick planks [Ethafoam 2.2] are applied to outer side to protect the tanks just in case of an outside impact. This area left unaddressed also becomes an echo chamber adding to cabin noise. The Ethafoam is also used at the top to seal out debris that has a tendency to enter into the enclosure from the engine bay and accumulates at the bottom of the rocker panel area. Once water easily enters that area, it becomes a rust factory; hence most Meraks have rust in the rocker panels.
Sealing with sponge rubber weather stripping is advisable. The sponge rubber weather stripping should be no thicker than 2.5 inches or 6.3 mm otherwise the water runoff tray will not properly fit. This picture shows how the weather stripping should be fitted to the underside of the vent. This will ensure that all water will drain properly to the back of the tray.
The white arrows indicate where complete sealing should take place once the tank is installed and the gas fill-up housing is back in position. It is a good idea to fill the fill-up area with plenty of water, with flashlight in hand, check for water drips. There should be none! Note how the weather stripping is applied on the underside of the vent.

The tank is installed and fully connected.

A template is made from the Ethafoam to secure the top of the tank. All spaces are filled with Ethafoam for stabilization and added insulation/protection.

The tank is fully stabilized and insulated. Replace the top plastic cover while the bonnet/hinge is in the most upright position to allow for proper clearance.

Now you will have safe motoring, knowing the gas tanks are properly insulated and protected with the best of modern day materials, better than factory new.
Enjoy the ride!!!
Ciao,
Merak Group
The content of this document/site are copyrighted by Merak Group LLC 2013.
Parts of the content are copyrighted by their respective owners. Not affiliated with Maserati S.p.A.